You can use Response Mapping to save data from API to a Custom Field If the API returns data in JSON format. Many times you may want to get data from an API and show the data to the user. For example, we will use a currency exchange API to show how you could save the data returned from an API to a custom field. Below is the response from the API.
 {
    "success": true,
    "timestamp": 1519296206,
    "base": "EUR",
    "date": "2021-03-17",
    "rates": {
        "AUD": 1.566015,
        "CAD": 1.560132,
        "CHF": 1.154727,
        "CNY": 7.827874,
        "GBP": 0.882047}
Actions: it is optional to include this field. You can use actions to add/remove tags, set/unset custom fields, send a flow…
Add Tag

{
"messages": [],
"actions": [
,
        "JPY": 132.360679,
        "USD": 1.23396
    }
}
If we want to show the USD value, you will need to use rates.USD, we advise you to test your Request, copy the response and use this service to get the correct JSONPath. Also, you can use this service to check if your JSONPath is correct. No need to start your JSONPath by x.

There is two way to display the data returned from an API to the user inside your bot. You can save the data to a custom field using Response Mapping and use the Custom Field in your flow to show the data to the user. Also, your API could return messages ready to be displayed to the end user inside your bot (Dynamic Contents). Dynamic contents are explained below in this article.
On the response mapping, use http_status_code to get the response code and use http_response_body to get the whole response body. Once you save the HTTP status code into a custom field, you can use conditions to do any logic you want.

Dynamic contents allow you to generate content from your own server and display them to the user inside your Chatbot. Dynamic content is supported on all channels. You use a single format that works on all channels. Our platform automatically converts your message in real-time and delivers it to the user.
You can’t use the Dynamic Content feature If you don’t own the API that you are getting data. In this case, you can save data from the API to a Custom Field using Response Mapping and display the data by using the Custom Field on the flow builder.
The response format is below.
{
    "messages": [],
    "actions": []
}Messages: contains messages that are sent to the user inside your bot. You can send any type of content supported by Messenger Bots. We show some format examples in this article, but you can read Facebook documentation if you need more capabilities.Todook sends a header ‘ X-USER-ID‘ on every Request.quick_replies is always optional.
Send a text message.
{
    "messages": [
        {
            "message": {
                "text": "Hello world",
                "quick_replies":[]
            }

        }
    ]
}
Sending more than a single message
{
    "messages": [
        {
            "message": {
                "text": "Hello world"
            }
        },
        {
            "message": {
                "text": "This is the second Message",
                "quick_replies":[]
            }
        }
    ]
}
Sending a text message with buttons.
The text message can contain up to 3 buttons. The title of each button can contain up to 20 characters. To send a flow when a user clicks on a button, just use a flow ID as a payload of the button. Every resource on Todook has a payload. You can use any payload, and the user will be redirected to the content of the payload. For example, if you want to show a product instead of a flow, just use the payload of a product.
 {
    "messages": [
        {
            "message": {
                "attachment": {
                    "payload": {
                        "buttons": [
                            {
                                "title": "Open Website",
                                "type": "web_url",
                                "url": "your_URL"
                            },
                            {
                                "title": "Send FLow",
                                "payload": "<payload>",
                                "type": "postback"
                            },
                            {
                                "title": "Call Number",
                                "type": "phone_number",
                                "payload": "<your_phone_number_with_county_code>"
                            }
                        ],
                        "template_type": "button",
                        "text": "Hello world"
                    },
                    "type": "template"
                },
                "quick_replies":[]
            }
        }
    ]
}
Payload: you can use any flow/step ID as a payload. For example, if you want to redirect to a flow once the user clicks on the button, you can use the flow ID as a payload. In this article, we show how to use actions as payloads also.
Sending a message with quick replies
Quick replies can be added to any type of message (text, file, gallery, file, …). Facebook allows you to attach a maximum of 11 quick replies to a message. The payload for quick replies is the same as the payload for buttons.
    {
   "messages": [
       {
           "message": {
               "text": "Hello world",
               "quick_replies":[
                  {
                     "content_type": "text",
                     "title": "Quick Reply 1",
                     "payload": "<payload>"
                  },
                  {
                     "content_type": "text",
                     "title": "Any Text Here",
                     "payload": "<payload>"
                  }
               ]
           }

       }
   ]
}
Payloads on quick replies and buttons have the same structure.
Send an image, video, audio, file.
You can use the same structure below to send an image, video, audio, and file. Just change the media_type to video, audio, or file. “URL” will be the link to your image, audio, video, or file.
  {
    "messages": [
        {
            "message": {
                "attachment": {
                    "type": "image",
                    "payload": {
                        "url": "<ASSET_URL>"
                    }
                },
                "quick_replies":[]
            }
        }
    ]
}
Send a single Card
The title and subtitle of the card can be up to 80 characters.
{
    "messages": [
        {
            "message": {
                "attachment": {
                    "payload": {
                        "elements": [
                            {
                                "title": "Card Title",
                                "subtitle": "Card Subtitle",
                                "image_url": "image_url"
                            }
                        ],
                        "template_type": "generic"
                    },
                    "type": "template"
                },
                "quick_replies":[]
            }
        }
    ]
}
Send a single Card with buttons
A card can contain up to 3 buttons.
{
    "messages": [
        {
            "message": {
                "attachment": {
                    "payload": {
                        "elements": [
                            {
                                "title": "Card Title",
                                "subtitle": "Card Subtitle",
                                "image_url": "image_url",
                                "buttons": [
                                    {
                                        "title": "Button Label",
                                        "type": "web_url",
                                        "url": "your_URL"
                                    },
                                    {
                                        "title": "Button Label",
                                        "payload": "<payload>",
                                        "type": "postback"
                                    },
                                    {
                                        "title": "Button Label",
                                        "type": "phone_number",
                                        "payload": "+your_phone_number"
                                    }
                                ]
                            }
                        ],
                        "template_type": "generic"
                    },
                    "type": "template"
                },
                "quick_replies":[]
            }
        }
    ]
}
Send a Gallery
Basically, a gallery is a set of cards. A gallery can contain up to 10 cards. The code below shows a gallery with 2 cards. You can also add a button to each card.
  {
    "messages": [
        {
            "message": {
                "attachment": {
                    "payload": {
                        "elements": [
                            {
                                "title": "Card Title 1",
                                "subtitle": "Card Subtitle 1",
                                "image_url": "image_url 1",
                                "buttons": []
                            },
                            {
                                "title": "Card Title 2",
                                "subtitle": "Card Subtitle 2",
                                "image_url": "image_url 2",
                                "buttons": []
                            }
                        ],
                        "template_type": "generic"
                    },
                    "type": "template"
                },
                "quick_replies":[]
            }
        }
    ]
}
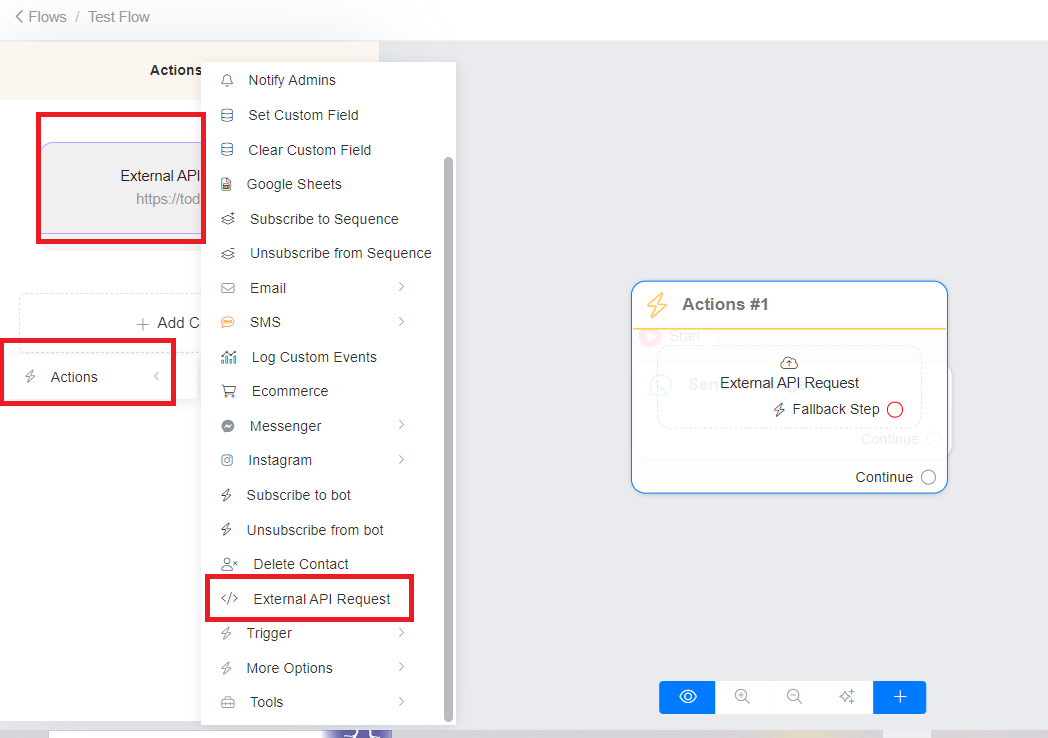
Actions: it is optional to include this field. You can use actions to add/remove tags, set/unset custom fields, send a flow…
Add Tag
{
    "messages": [],
    "actions": [
        {
            "action": "add_tag",
            "tag_name": "..."
        }
    ]
}
Remove Tag
{
    "messages": [],
    "actions": [
        {
            "action": "remove_tag",
            "tag_name": "..."
        }
    ]
}
Set Custom Field
{
    "messages": [],
    "actions": [
        {
            "action": "set_field_value",
            "field_name": "...",
            "value": ""
        }
    ]
}
Unset Custom Field
{
    "messages": [],
    "actions": [
        {
            "action": "unset_field_value",
            "field_name": "..."
        }
    ]
}
Send Flow
To get the flow ID, you need to go to the list of flows, click the 3 dots, and click Get Link. The flow-id is the number included on your link. Flow ID is always numeric. You can combine an unlimited number of actions.
  {
    "messages": [],
    "actions": [
        {
            "action": "send_flow",
            "flow_id": "..."
        }
    ]
}
Combine multiple actions
You can combine multiple actions in a single request to allow you to run multiple simultaneously. For example, you may want to set a custom field and send a flow in a single request.
   {
    "messages": [],
    "actions": [
        {
            "action": "set_field_value",
            "field_name": "...",
            "value": ""
        },
        {
            "action": "send_flow",
            "flow_id": "..."
        }
    ]
}
Use actions as a payload of buttons and quick_replies
Below is the format to use an action as a payload on buttons. But since a payload is a string, you need to convert your actions object to a JSON string. If you are using PHP, use json_encode to get a string representation of your object.
  {
    "actions": [
        {
            "action": "send_flow",
            "flow_id": "..."
        }
    ]
}
Below, the action above is used as a payload of the button.
{
    "messages": [
        {
            "message": {
                "attachment": {
                    "payload": {
                        "buttons": [
                            {
                                "title": "Click Here",
                                "payload": "{\"actions\":[{\"action\":\"send_flow\",\"flow_id\":\"...\" } ]}",
                                "type": "postback"
                            }
                        ],
                        "template_type": "button",
                        "text": "Hello world"
                    },
                    "type": "template"
                },
                "quick_replies":[]
            }
        }
    ]
}